Installation Method: Substrate wall treatment --- Layout and marking --- Mixing of special adhesive --- Application of adhesive mortar --- Panel arrangement --- Installation of exterior wall insulation and decorative integrated panels --- Anchoring --- Joint treatment --- Panel surface finishing --- Self-inspection --- Product maintenance and inspection.
1. Substrate Wall Treatment: When installing exterior wall insulation and decorative integrated panels, it is necessary to clean the base wall of any release agents, concrete residue, dust, and other debris to ensure proper wetting and penetration of the adhesive mortar with the substrate, thereby strengthening the bonding strength of the mortar.
2. Layout and Marking: Use a plumb line or a theodolite to mark vertical lines at the building's corners as reference lines to control the vertical alignment of the corners. Simultaneously, mark vertical and horizontal lines from bottom to top on each layer to control the verticality and horizontality of the exterior wall insulation and decorative integrated panels.
3. Mixing of Special Adhesive: Mix the mortar with a handheld electric mixer for about 5 minutes until a uniform consistency is achieved. Ensure the polymer mortar reaches the required bonding strength.
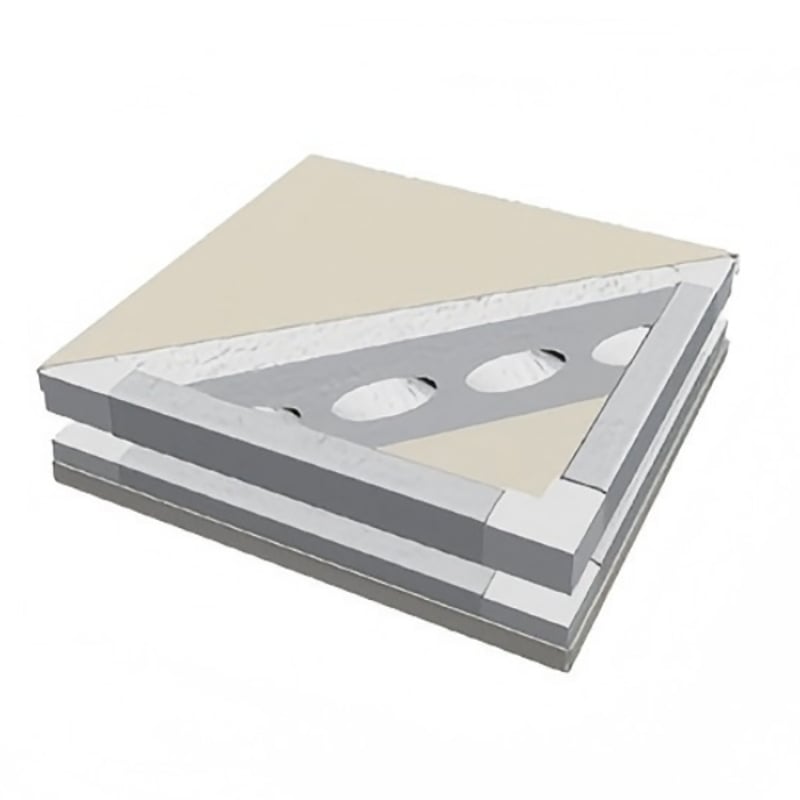
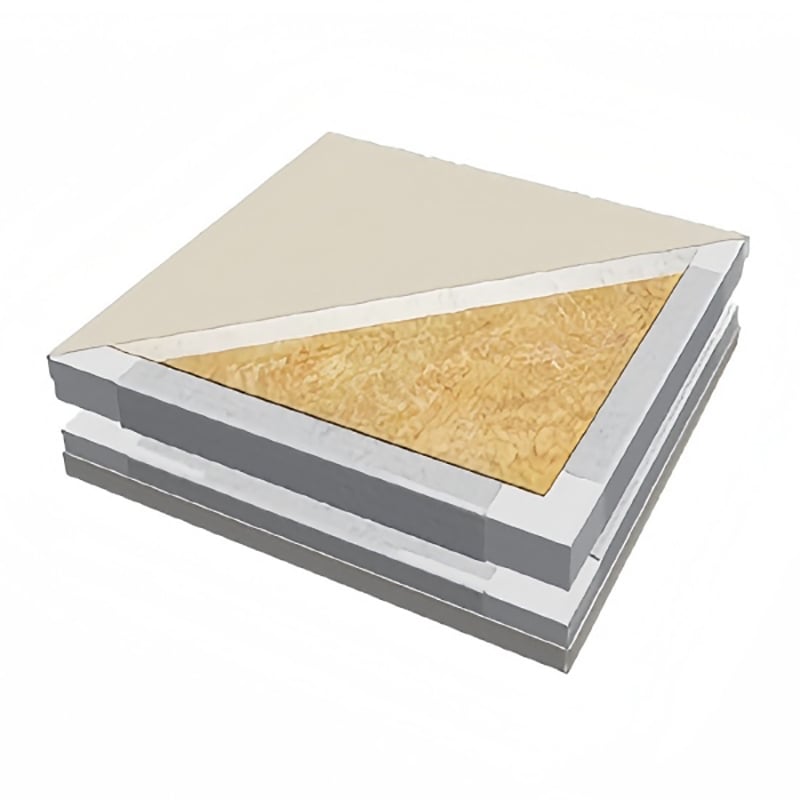
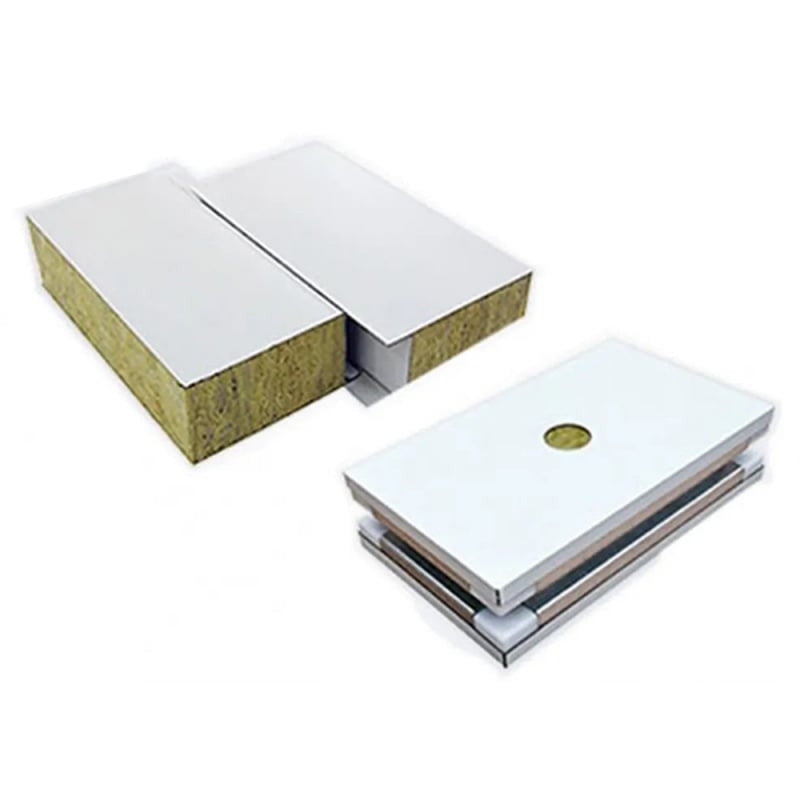
4. Application of Adhesive Mortar: When attaching the exterior wall insulation and decorative integrated panels, use the dot-and-frame method. Apply adhesive mortar 80-100 mm wide and 10-30 mm thick around the perimeter of the panel, leaving a 50 mm air vent channel. Then, apply circular adhesive mortar dots with a diameter of 100 mm and a thickness of 10-30 mm in the center, spaced approximately 100 mm apart (this can be adjusted based on the panel size). The total area covered by the adhesive mortar should not be less than 40%-50% of the single panel area.
5. Panel Arrangement: Arrange the panels horizontally, ensuring vertical alignment and square corners. 6. Installation: When installing, evenly knead the exterior wall insulation and decorative integrated panels to ensure close contact between the adhesive mortar and the wall surface, and align them with adjacent panels. Scrape off any excess adhesive mortar with a trowel to ensure a tight bond. Use a 2M straightedge and plumb bob to check for flatness and verticality. When installing the panels, be careful to remove any excess adhesive mortar from the edges to prevent "mortar buildup" between the panels and ensure proper joint alignment.
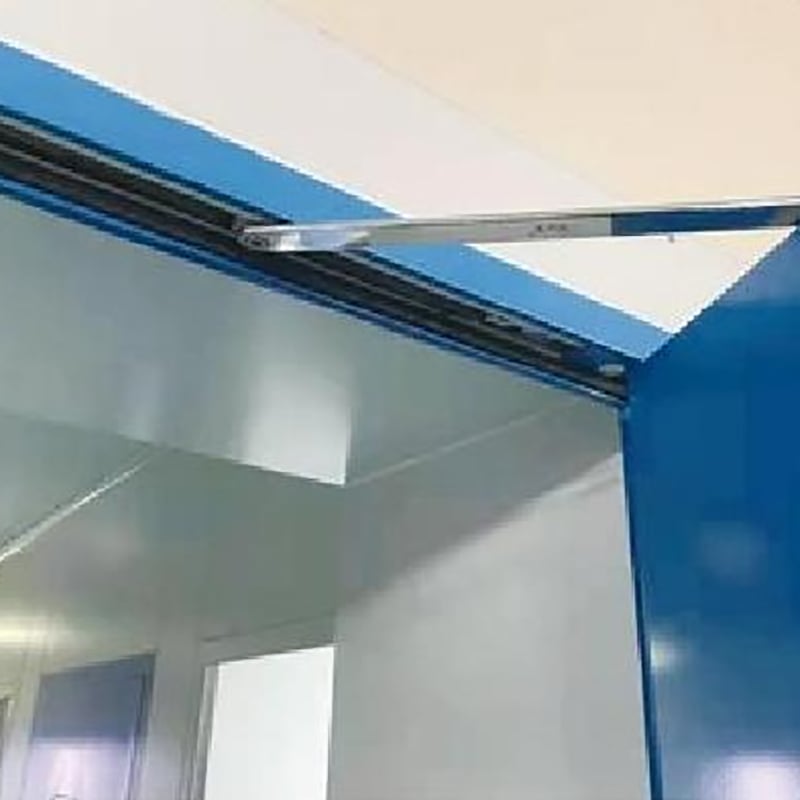
7. Anchoring: After the exterior wall insulation and decorative integrated panels are installed, mechanical anchors (expansion bolts) should be used to fix the extruded polystyrene boards according to design requirements. Use an impact drill to drill holes between the seams of the two insulation and decorative integrated panels, within the grooves. The hole diameter depends on the diameter of the anchor (expansion bolt), and the length of the anchor (expansion bolt) depends on the thickness of the exterior wall insulation and decorative integrated panel, with the penetration depth into the wall not less than the design requirements. The anchor head and washer should be within the groove between the panel seams and should not protrude beyond the surface of the exterior wall insulation and decorative integrated panel, remaining hidden between the panels to ensure the decorative effect of the exterior wall insulation and decorative integrated panel is not affected. This truly achieves integrated insulation and decoration.
8. Joint Treatment: After cleaning the surface with a cleaning agent (determine whether to use masking tape based on actual conditions), immediately fill the gaps between the insulation and decorative integrated panels with joint sealant or other materials. The sealant application should follow the design drawings, paying attention to controlling the thickness of the sealant. It should be full, without gaps or bubbles. The trowel should move at a uniform speed along the joint, and the pressure applied to the sealant should also be uniform. Too thin a layer of sealant is detrimental to ensuring sealing quality and preventing rainwater leakage, and is also unfavorable for resisting tensile stress caused by thermal expansion and contraction of the insulation and decorative integrated panels; however, it should not be too thick either. When the sealant is subjected to tensile force, a thick layer is easily pulled apart and damaged, rendering the sealing and leak-proofing ineffective.
9. Panel Surface Cleaning: Within 3 days, remove the protective film and other debris from the panel surface and immediately clean the panel surface.
10. Self-inspection: If any problems are found, repeat the above procedures.
11. Product maintenance and inspection.
 Hot News
2026-06-25
2026-06-24
2026-06-23
2026-06-18
2026-06-17
2026-06-15

We believe that by upholding quality and embracing innovation, we can drive transformative changes in architecture and build a sustainable future for the construction industry.
No. 377, Gaoqi Road, High-tech Zone, Binzhou City, Shandong Province, China
Copyright © Shandong Apex Metal Products Co., Ltd. All Rights Reserved (Under the Glostar New Materials Group) Privacy Policy Blog